Showing posts with label furries. Show all posts

Friday, August 21, 2015

The “Wingless” Free Avatars (2009)


The following first appeared in Second Life Newspaper in August 19, 2009

*  *  *  *  *

By Bixyl Shuftan

When I first came to SL, alongside the newbie human avatars as choices for one’s first look was one nonhuman, the old ringtail avatar Luskwood donated to Linden Labs. I did find a few free furred avatars in my newcomer period, but aside from the purple kitty avie, nothing seemed an improvement until I had the cash to buy a better avatar.

 Later, I heard the newbie ringtail had been done away with as an option. So where could a newcomer go to get a furred av, particularly one with a quality look?

It was about that time I found out an answer: the Wingless Avatar package, a collection of quality avatars once sold, now free for the asking.

The Wingless Avatar package is a gift to the residents of SL from the avatar designer Wingless Emoto. He once sold his avatars through a retailer, but a dispute occurred and the business partnership dissolved. Unfortunately for Wingless, the contract signed stated he could not sell the avatars in the deals w ith him through anyone else. So Wingless decided to make them freely available, people able to grab a package at locations, or transferable from person to person. Some carry them not to wear, but to pass to newcomers to SL or those around for a while curious about furry avatars or wanting a different look. Some locations have individual Wingless avatars up for sale for 10L. But this is against the wishes of Wingless.

And the package has an impressive variety of avatars. There are many varieties of both wolf and fox-type avatars, cannids being a popular furred av in SL. There are also a few hyena and horse avs in the package. Rezzing the box on a sandbox and unpacking it, one gets a folder filled with each avatar, boxed. One has to rezz and unpack each avatar.

The avs come in both male and female skins. Highly modifiable, each av offers a choice of either plantigrade (walk on the heel like a normal human foot) or digitgrade (walk on the ball on the foot) lower legs. The latter looks more exotic, though someti ¥mes one can see the shadow of the invisiprims, and long pants worn end up looking cut off with a ring of fabric around the ankles. There is an option for small or large hands/paws. For the wolf avs, A Customization HUD gives you the option of showing canine teeth or not, and choosing the color of eyes, paws, claws, and the inside of ears. Another HUD, “Control,” allows for options for twitching ears, wagging tails, blinking eyes, and blushing.
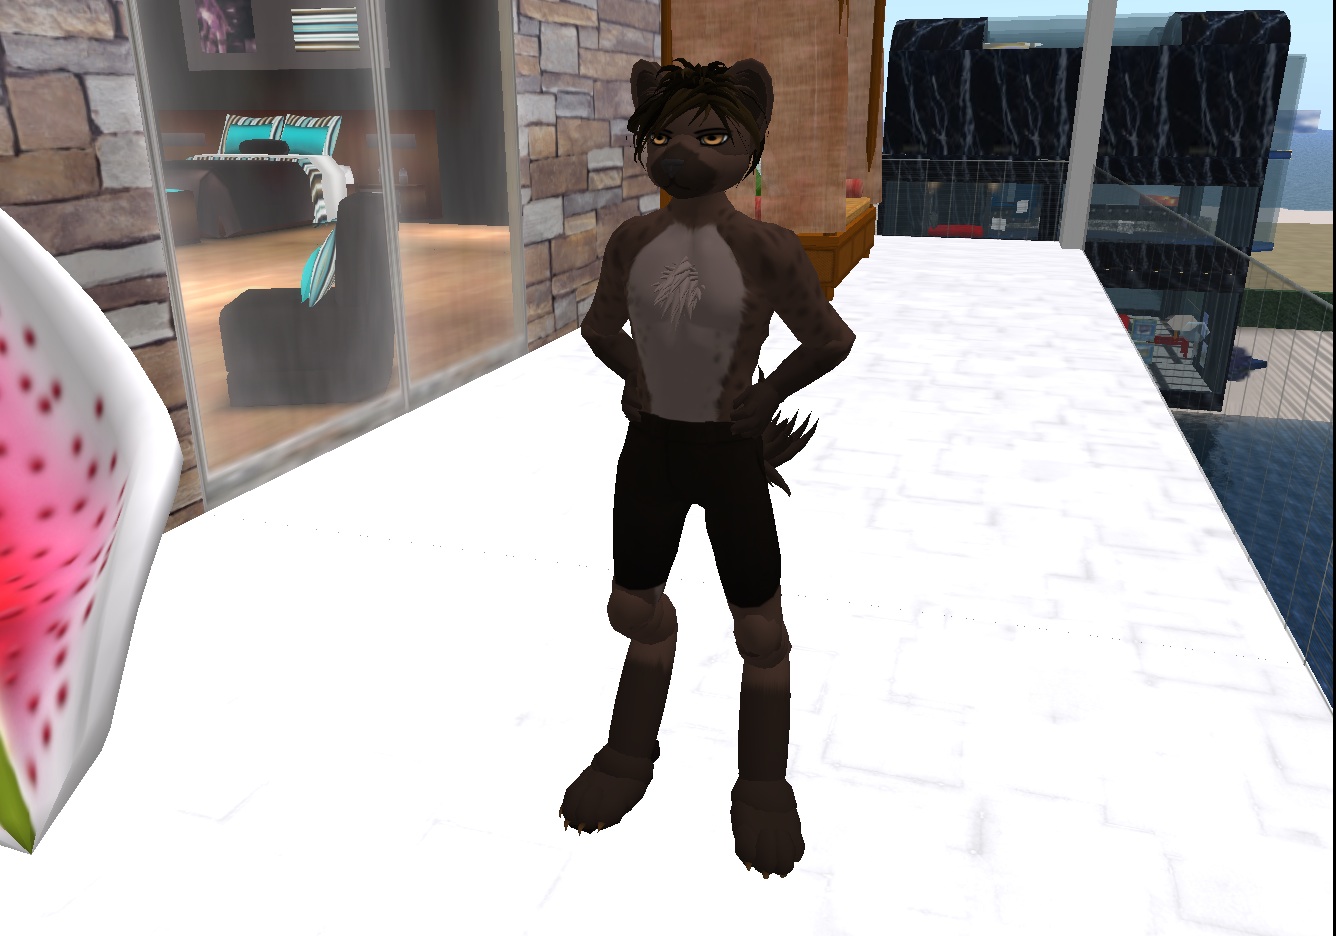
It should be noted one doesn’t *have* to wear the whole avatar. I have seen some kitsune-style nekos who told me their ears and tails came from Wingless avatar parts. As there are several styles of hair that come with the av, this means a few
free hairpieces. A good place to look if you need one in a hurry upon getting a av with no hair.

The Wingless Avatar Package can be found in some freebie locations, though in any place in SL with some furs, it shouldn’t take long to find someone who has it and get a copy.

A truly great package of free avatars.

* * * * *

Six years later, the Wingless avatars are still around. Despite that they're free, they're not worn as often as before. It seems most residents who prefer a nonhuman look whom get a set of them replace them with a more recent avatar as soon as they have the Lindens. There are also other avatars available as freebies, either legitimately such as the AX avatars at Northstar, or copied without their creators' permission and made available as free packages, such as Avenity.  Still, the avatar does have it's place in Second Life. It comes in a variety of colors that remain unmatched by some other lines of avatar. Plus with some clubs having script limits, some residents will find their favorite avatars will have problems getting them in. But with it's smaller number of scripts, the Wingless will have less trouble doing so. And if one runs across a resident interested in a nonhuman look but doesn't know where to go, one can just hand over a package of Wingless avatars.

*Addition* With the InWorldz grid becoming increasingly popular, a collection of Wingless Avatars was imported there as well. So now the avatars are available now in two grids. 

Bixyl Shuftan

Monday, November 25, 2013

Untangling Tango


By Becky Shamen

Today, we will be talking about BEWBS. In SL, females have a slightly different set of parameters that can be adjusted on their avatars. There is a setting that allows adjusting the breast size from 0 (pirate's dream-sunken chest) to 100 (OMG cup). As if that weren't enough, one can also buy add-ons, called prim breasts or implants. These can cost between L$800 and twice that. Like them or not, from my experience, they are a good investment. When I used them, as an "exotic" dancer, in adult clubs, I averaged L$600 per night in tips. They also inspired me to make and sell clothing for them, which brings in extra money even when I am not in world. I often log on to find myself a few hundreds richer than when I left.

Most implant clothing can be worn with or without implants. Implant clothing comes with "appliers", which, when worn, duplicate the texture of the clothing top (shirt, jacket or undershirt) on the clothing layer of the implants. My original clothing line was designed for use with Universal Implants brand, which was then the most popular brand. I also included a notecard with my products, called "the do it yourself guide to implants," in which I taught customers how to get the most out of their implants and even make their own clothes for them.

Now, the UI designer has quit SL and clothing for them is becoming hard to find. Since getting involved with Chest Treasures Mall, I have acquired a set of Lolas Tango implants, have added appliers to my original line and make all new outfits work with Tangos. Tangos are even easier than UIs to develop clothing for, so I offer the ladies some of the tricks I have learned, to enable them to make their own clothes and skin for them.


All SL clothing is based on templates. The Top Template is for Jackets, shirts, undershirts and gloves. The Bottom Template is for pants, underpants, socks and shoes. The Skirt Template is for skirts and jacket coat tails. Templates can also be used for making tattoos. Anything designed, using these templates, will fit any body shape. You can get these templates free, on line, by searching for "SL clothing templates." In the above illustration, we show the two layers used to make the black outfit, shown in the first image of this article. The bottom layer is the template. The top layer was made from a photo of the dress Beyonce wore at the Super Bowl half time show. I painted the gloves myself, to complete the look. When the clothing texture is finished, the template layer is turned off and the clothing layer is saved as a .PNG file. PNG files are the only type image that can be uploaded to SL and contain transparent areas. The areas in the above image, where you see the template, will show skin, in world.

Making Tango Appliers

The advantage of Tango implants is, the clothing layer uses the same texture as the one for the dress top. To make an applier, first go in inventory, right click the texture, and select "copy UUID number". All textures used in SL have a unique ID number. Now, make a copy of the applier that came with your implants and drag it to the floor to edit it. In the "content" tab, double click the "clothing configuration" file to open it. Replace the original ID number with your new one, then save and close the window. Now, while still in edit, rename the object to match the outfit it will go with, like "half time applier", then close the edit window. Now, a left click on the applier will put the texture on your implants and line up with the clothes being worn under the implants. Now, right click and take the new applier to your inventory. Make a copy to put in the same folder as the outfit. From here on, wearing the applier will put it on the bottom center of your screen. After clicking it, detach it, until the next time you need it.

Other implants work differently, but the above process will be pretty much the same for all of them. To assist my customers with other brands, I have always included the clothing top texture for them to work with.


Implants come with skin appliers, allowing them to be matched to any skin color on your avatar. However, there is no way they can include skins for furries. You could just make them the right color, but that would not match the 3D shading and variations of hair colors. To use implants with your furry, you will want to make a skin applier. The steps for making one are the same as for clothing appliers, but the texture template is different. The implants don't come with a template and the skin texture is no copy, so where do you get a template? Here is how I made my own skin template. While wearing the implants, right click and edit them. Check the box to edit individual prims and scroll to the skin layer, using [ctrl]+[.] or [ctrl]+[,]. In the "texture" tab, click on the texture image of the skin, which will show it about 1.5" square. Using a paint program that can capture images on screen, grab the screen shot and crop it to just the square skin image. To get good resolution on your planned furry skin, resize the captured skin to 1024x1024 (the largest size image SL allows to be uploaded). This is now your implant skin template.

Now you will need an image of your furry's chest area, to be fitted to the template. Wear the skin, then edit appearance, to hold your av still for a photo. Set your breast size to 0, so that the image will contain all of the breast area in a 2D image. Position your camera to get a close-up of the chest area. The area photographed does not have to be exactly like the template, as long as it contains the full breast and area up to the clavicle (collarbone). Save a HD snapshot to your computer. Copy this image to a new layer, above the skin template. Move and stretch the furry layer so that it overlaps the template in 3 key locations, the nipples and clavicle. When everything is matched up, save the furry layer as a PNG file and upload it to SL. The UUID number of this new texture will be used for making a new skin applier. In making the skin applier, follow the same steps used in making a clothing applier.

Your first time at making clothes, skins and appliers will take some time, but after the initial experience it gets much faster. Within a few months, you might be ready to open your own clothing shop.

Have fun getting busted.

Becky "Sha" Shamen